Backs, trading and painting
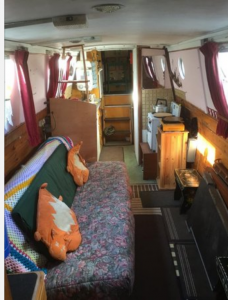
Oh, my goodness lovely followers, the past couple of weeks seem to have been eaten up with a trapped nerve in my back, trading, painting and a day learning more about how to paint from Julie Tonkin, a senior journeyman with the now folded Waterways Guild. More about that next time. Today’s post is more about my fixing up Pea Green. In previous posts I have already mentioned the outside paint-job and sign-writing, along with the cleaning up of the inside of the boat. Over the past 18 months I have also done some fixing and DIY on the inside too.
Gung-ho DIY
I am not a major DIY-er but as the boat is quite small much of the work seemed do-able. Especially as unlike a house lines are curved – good for my wonky eyes, and if things went wrong I hoped it wouldn’t be too hard to put right! Basically, I have continued the gung-ho attitude that led me to boat buying in the first place. Much of the work has been cosmetic and repairing bits and pieces that hadn’t been maintained for a long time.
Freebies and left-handedness
As I don’t have a major stash of cash to spend on the boat I have kept the layout the same and have tried to replace and update using recycled wood or other cheap options, and with the exception of the electrics I have done all the work myself. As a girl who went to school in the 70s and 80s I had the dubious honour of never being given the option of DT at school. Plus, as a left hander I always seem to be trying to work out ways to do things the opposite way around. As a result I know my woodwork is not the best, this is where the curves of the boat come in handy, they cover a multitude of sins.
The task in hand
The boat is a single cabin, with no internal doors, except the bathroom cupboard. In the main cabin when I bought the boat it had a click-clack sofa-bed with a wild, sparking, nylon, flowery cover, under this there were multiple layers of various raggedy mattress covers. Next to the stern doors is a full length hanging area, which now doubles as Monte’s hidey hole. When I bought the boat the only other storage in the main cabin was a pine bedside cabinet, which was pointless as it provided no real storage and didn’t fit the curved line of the boat. This of course annoyed me immensely and it had to go.
New shelves
I replaced the cabinet with two built in shelf units, one at each end of the sofa bed, using wood from the local Freecycle listings. I managed to work out how to cut the wood with the curve of the cabin wall and bought a jig-saw for all my wood cutting – so much easier than a hand-saw. These built in shelves have been so useful for storing clothes, bedding and other bits and pieces, finally somewhere to put things!
Soft-furnishing bonanza
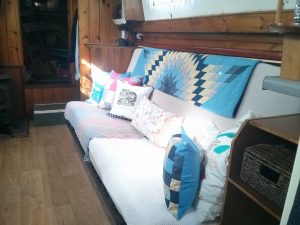
When it came to the sofa bed I took the sofa bed back to the house and re-covered them, sewing on an old mattress cover before re-upholstering with fleece. The fabric was not too expensive and I wanted something I could remove and wash, rather than a heavy-duty upholstery fabric. I then went into crazy cushion making over drive and made lots of different cushions. I used scraps of fabric, my favourite dress from when I was 10 and other bits from another dress circa 1972! Other fabric was left over from previous projects, and a day of block printing with my sister gave me another cover. I did buy transfer paper and made one cushion with my favourite Alice in Wonderland quote, ‘Would you tell me please, which way I go from here?’ and of course featuring the Cheshire Cat.
Bung in a porthole
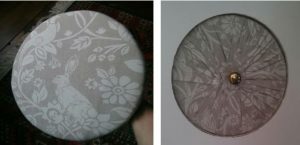
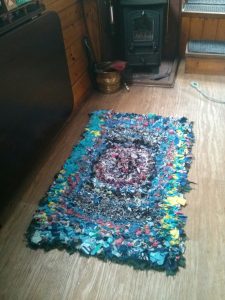
Other soft furnishings have been the blinds, again using left over material and making a porthole bung. My first foray into cutting a circle with my new favourite power tool – a jig-saw. The boat is small and with blinds there is no need for rails to hold the curtains back, nor do they take up wall space. I did buy roman blind kits and have lined with black-out material to help block the light. The galley and bathroom cupboard have roller blinds, I did succumb to buying new fabric for these! I also made a snip rug for the floor. I had no idea how much fabric they take, nor how heavy they are once finished.
Dead cooker
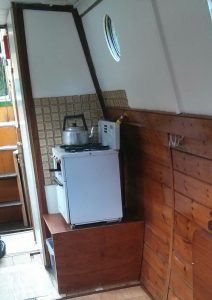
When it came to the kitchen area the boat did have an old Flavel cooker when I bought it. The previous owner did warn me that one ring didn’t work, which cleverly my Dad managed to fix – a tiny spring had gone in the knob. However, when I had a gas check I learnt the oven was not burning a blue flame, and despite my best efforts to remove the rubbish/rust from the burner I still could not get a constant blue flame. This would mean the cooker would fail the Boat Safety Certificate. I was left with little option to to bite the bullet and find a replacement.
Marine price tag
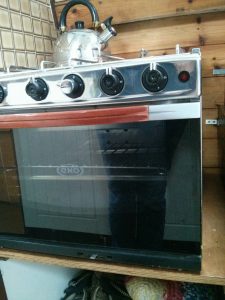
Of course any cooker that has ‘marine’ in its description immediately adds £300+ to the price tag. You can buy a regular gas cooker and adapt it to LPG, but in a tiny boat, it just wouldn’t fit. (I will spare you the details of why it wouldn’t – message me if you need detailed pointers!)

Luckily, Ebay was my saviour and I found a second hand Force 10, Eno marine cooker for the bargain price of £100. It was a risk to buy unseen and I did have to drive to Norwich to collect it, but I reckoned it was worth a punt – especially as new they sell for upwards of £700. It was actually a great buy and as a keen cook I regularly use it for homemade pizzas, scones and all sorts on the boat. I built in a new shelf for it to sit on, again using Freecycle wood, and left room underneath for the bin and other bits and pieces. The previous cooker although smaller was on a much lower shelf, which just seemed a bit odd.
Fridge fun
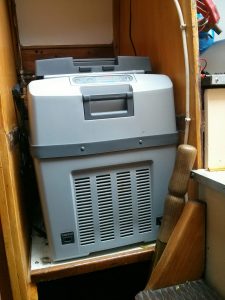
Similarly, the old fridge had to go. It was an old 3 way, and took up a huge amount of space, but inside you could probably fit an egg and a small can of tonic! There was also a problem with starting it, and I never did manage to light the ignition. This was clearly no use at all. Again, gas or 12v fridges are expensive, so I did some digging and found that Waeco Tropicool TCX coolbox was probably the way to go. These coolboxes are very efficient and don’t use too much power, but again all of this efficiency comes at a price… £250 for a 35l version. Once again, I struck lucky and found an ex-display model online for £100 less, so now I have room to keep my tonic cold.
Sink almost bigger than the boat
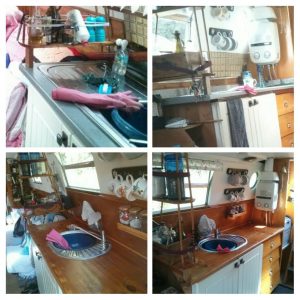
With the kitchen appliances sorted, there has been some work to do on the work-surfaces and splash backs. I was very bothered that a full-size house kitchen sink took up all of the work-top. The work-surface also overhung the end of the units by about 8cm – also a point of irrational irritation. Plus, (yes really it gets worse) I was even more bothered by the row of grim looking 1970s tiles didn’t actually meet the work-surface nor the back of the cooker. It was as though they had been stuck on as a ‘feature’ rather than a working splash back.
The old shed roof
The question was, what to use and how to cheaply source the materials. It would have been easy to go out and spend a fortune on new work-surface, swanky tiles and new sink – but of course I didn’t. Also I didn’t want to buy 3m of worktop a I only needed a little over a metre. Ultimately, I used more unusual materials, in the form of my old shed roof.
Last year, my Dad, who continues at the age of 79 to be a DIY wizard extraordinaire, came to replace my shed roof, as it was beginning to leak. The marine ply that was underneath the felt was not suitable for the new rubber roof. I kept the old wood, ‘just in case’ and as no marble worktop dropped from the sky I decided to use the wood for the worktop and splash back.
Slinky sink
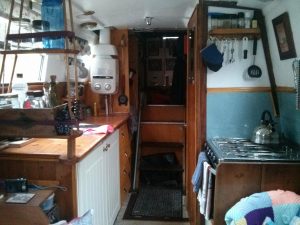
I bought a new small sink, with a ½ drainer from Scewfix (where my job title is listed as ‘Queen of the Pixies’). I then managed to cut the old shed roof without mishap. The biggest issue was fitting the new tap, as I found a number of leaks on the existing boat pipework. Little wonder the water pump had been making kur-plunk noises on a regular basis. The previous owner had ‘fixed’ this with toilet-paper wrapped around the leaking joints… My new friends at Screwfix helped me get the right fittings and I was very excited when the new shed-roof-worktop, sink and taps were in place. With lots of wood still left I made the splash back from another piece of the shed roof. The wood has blended well with the existing pine panelling, and although not to everyone’s taste defiantly looks ‘right’ on the boat.
I didn’t use the wood as a cooker splash back – it didn’t seem a safe option. Instead I sorted it when Dad supplied me with two pieces of Formica off-cuts from my parents’ new kitchen.
Old Kilner jars and wooden crates
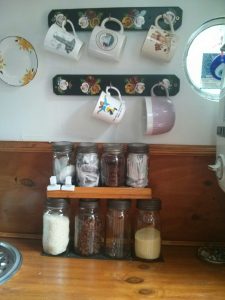
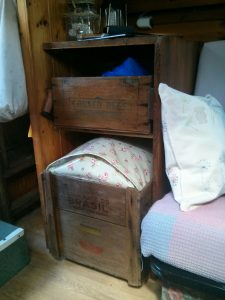
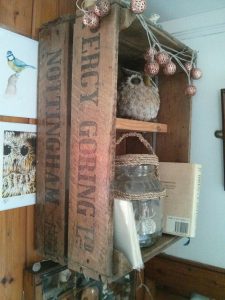
I have added a small shelf to the sink and worktop splash-back and was very excited to come across some old -including a couple of original – Kilner jars on Freecycle, perfect for storage. They fit so well alongside all of the old wooden crates again found by my Dad lurking in his garage. The boxes originally came from my grandparents’ old house. These too have made perfect shelves and storage in the boat.
It has been a long haul and there are still a number of ‘works in progress’ but most of my OCD moments are now dealt with. More about other changes I have made in future posts.
For a “non-DIY” person you’re sure doing a great job. I love the sink counter-top from the old roof. Very nice work all around.
David
Thanks David! Yes the shed roof has been amazing 🙂 used it for lots of jobs.